Their Mom's pretty amazing too, but not so crafty... so her best friend from high school and I are re-doing their rooms (is it re-doing if they were never 'done'?).
One girl is always in pink, and one in purple, so it just seemed likely that those are the colors we are going to use.
We picked out two pieces of scrapbook paper that had paisley on them.
Even though the wood letters are mostly smooth, sand the edges.
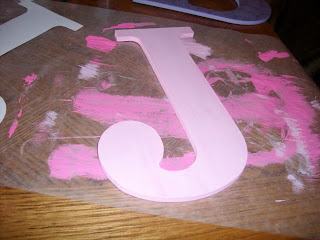
Make sure that you paint the entire back of your letter, and all the sides.
I had picked a brighter pink, but when I laid the paper over it, it was to much of a contrast (see the color on the wax paper).
Trace your letter on the scrapbooking paper, and cut INSIDE the line,
because you want it a bit smaller then the letter.
It's not important to paint the front of the letter completely, it will be covered. Mod Podge the front of the letter, I use a sponge brush for a smooth coat.
Once you have put the Mod Podge on, carefully lay the paper on the top of the letter.
{don't do what I did, and put a 1/4 inch gap... its not so easy to peel the paper back up}
I start at the top, and rub side to side all the way down to make sure it adhere to the wooden letter. It also helps minimize the bubbles (but if you get them, use the edge of a razor blade to 'pop' them, then push the air out).
If you have some extra over the edge, you can cut it (if your careful and have small scissors), or gently sand it off, I found that if you go from the front to the back, in only that direction, it works best, and you don't risk pulling the paper up off the letter.
Do you like my two helpers (this was the state of my coffee table for over a week with several different projects... My ocd husband was on the edge!)
This is close to the ending idea, I got these cute frames at the local Goodwill, and will do something with them. We're going to make shelves for each of the girl with their initial and a photo.


So glad you posted this! I have been wanting to make these for M's room, but wasn't sure how to do it!
ReplyDeleteCute! These are so fun!
ReplyDelete